Printing Setup for Faculty/Staff Use
Printers are available near your office, usually in the faculty lounge, department coordinator's office or a secured closet. CUS will usually have set up your Reed computer to print to the printer nearest your office. If you need help, contact CUS or ask your department coordinator or supervisor. You can also follow the detailed instructions below to setup an IP printer for your computer.
Have a supplies request or need to report a broken printer? Check out our printer and copier support page for more information.
Upon completion of the steps below, your printer will appear in the normal Print... dialogue on your computer.
Setting up a Printer/Copier in macOS
To add a printer or copier on macOS, you should first check the Self Service application for the printer or copier you want to add.
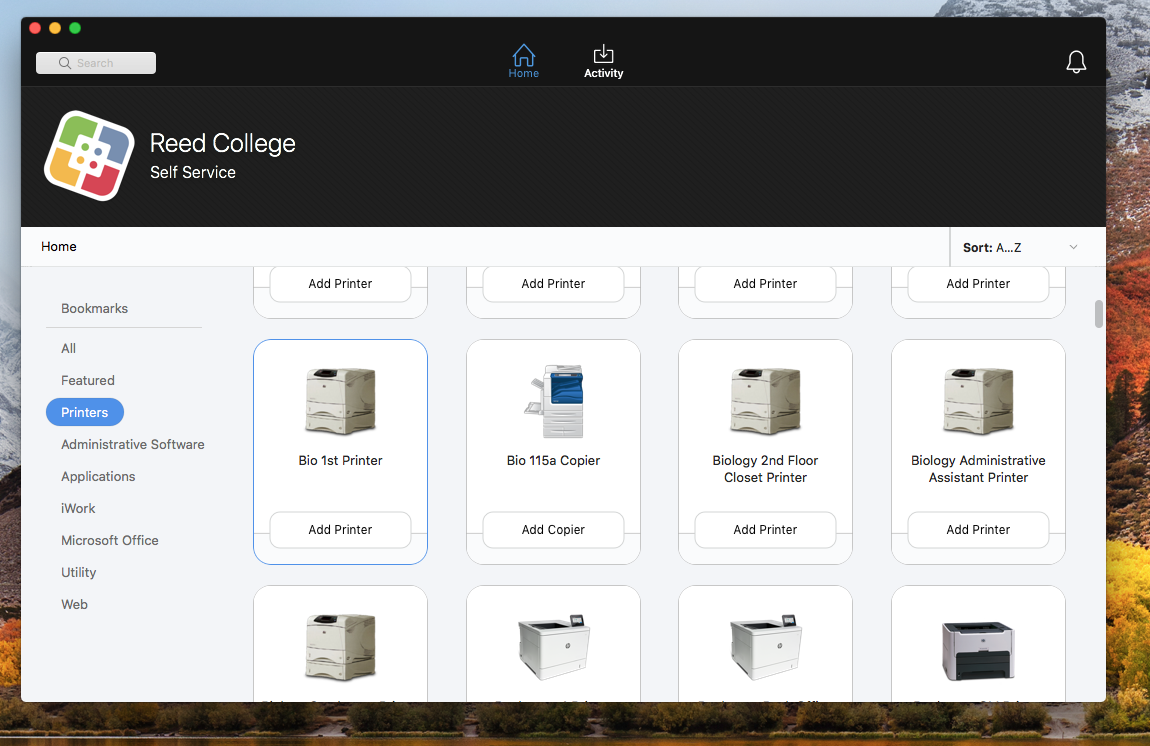
- In Finder, open your Applications folder.
- Open the Self Service application and go to the Printers section on the left.
- Find the printer or copier you want, if it is not listed please contact cus@reed.edu to let us know.
- Click the Add Printer/Copier button and wait for it to install.
- The copiers have various options, such as printing in black and white vs. color and stapling. Learn how to configure these output options.
- If you use the copier in Chemistry or Strategic Communications, please follow these additional steps.
Setting up a Printer Manually in macOS
To setup a printer, you will need to enter its Network Address. Refer to our list of printer IP addresses for faculty, or our list of printer IP addresses for staff, from where you can highlight, right-click and "Copy" the correct address.
If you need to add the printer or copier immediately and it is not available via the Self Service application in your Applications folder, you can follow these instructions to add it manually.
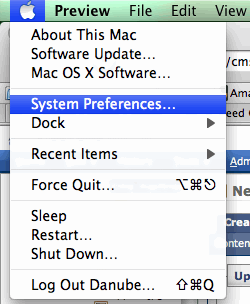
- Open System Preferences.
- Go to Printers and Scanners.
- Click on the plus button below the left side-panel.
- On the top of the new window, click on the tab called IP.
- Click on the drop-down menu next to Protocol and select "HP Jetdirect - Socket".
- In the text field next to Address, enter the network address of your printer. (For example, vol1st.printers.reed.edu for the Vollum first floor printer)
- In the text field next to Name enter a unique name by which you wish to remember this printer.
- Click on the drop-down menu next to Print using, then click on Select a driver to use.
- Type HP in the search field and select the correct printer model.
- On the next Installable options pop-up click on the checkbox next to Duplex Unit in order to enable double-sided printing.
Setting up a printer in Windows
To setup a printer, you will need to enter its Network Address. Refer to our list of printer IP addresses for faculty, or our list of printer IP addresses for staff, from where you can highlight, right-click and "Copy" the correct address.
- For Xerox printers, download and install the Xerox driver. Extract the drivers somewhere on your computer you can easily find later.
- Navigate or Search for Printers and Scanners in settings and click Add a printer or scanner.
- Let the printer search timing out, an option will appear 'the printer I want isn't listed' click Add manually.
- In the new window, choose Add a local printer.
- On the next screen, choose create a new port. For the type of port, select Standard TCP/IP port.
- Hit Next. Put in the network address of the printer and uncheck the Query the printer and automatically select the drive to use option.
- On the next screen, choose Use the driver that is currently installed. Hit Next, Next and Finish.
- For Xerox printers, navigiate and select the driver file you unzipped in step 1.
- If, on step 7, the window asks you to specify a driver, and you can't find the driver on the list, click the Windows Update button. Wait a few minutes for it to update, and the new list should contain additional drivers. Choose the driver matching the printer you want to add and click Next, Next and Finish.
- If asked to "share" the printer, uncheck it.
Setting up a copier in Windows
- Install the Xerox driver corresponding to your system version here to get the latest version of the copier drivers (Hit continue if asked to add copier).
- Extract the drivers somewhere on your computer you can easily find later.
- Navigate to "Printers and Scanners" in settings and click "Add a printer or scanner".
- Let the printer search timing out and click "the printer I want isn't listed".
- In the dialog which pops up select "select a shared printer by name" and enter "http://ipp.reed.edu:631/COPIER_NAME" where COPIER_NAME is like one of the copiers in the table below.
- Click "next" and in the dialog box click "Have a disk" and then browse to the location of the driver folder. Inside the driver folder select "UNIV_5.860.1.0_PS_x64_Driver.inf/x3UNIVP.inf" and click "open" followed by "ok". (Generic PS or PCL6 drivers packaged with Windows will also work).
- When given a choice of printers choose "Xerox Global Print Driver PS" and click "Ok", "Next", and "Finish".
- Restart your computer.
- Print! You may need to clear your job from Papercut by going to printing.reed.edu/client to choose an account for print billing.
| Bio 115a | printers/bio115a_copier_win_printers_reed_edu |
| Chemistry Copier | printers/chemistry_copier_win_printers_reed_edu |
| Eliot 413 | printers/eliot413_copier_win_printers_reed_edu |
| ETC Faculty Lounge Copier | printers/etc200_copier_win_printers_reed_edu |
| Library 310 Copier | printers/lib310_copier_win_printers_reed_edu |
| Library 325 | printers/lib325_copier_win_printers_reed_edu |
| Library IMC | printers/IMC-copier-win |
| Physical Plant Copier | printers/physical_plant_copier_win_printers_reed_edu |
| Psych 118 | printers/psych118_copier_win_printers_reed_edu |
| Vollum 1st Floor Copier | printers/vollum_copier_win_printers_reed_edu |
| Vollum 301b Copier | printers/vollum301b_copier_win_printers_reed_edu |
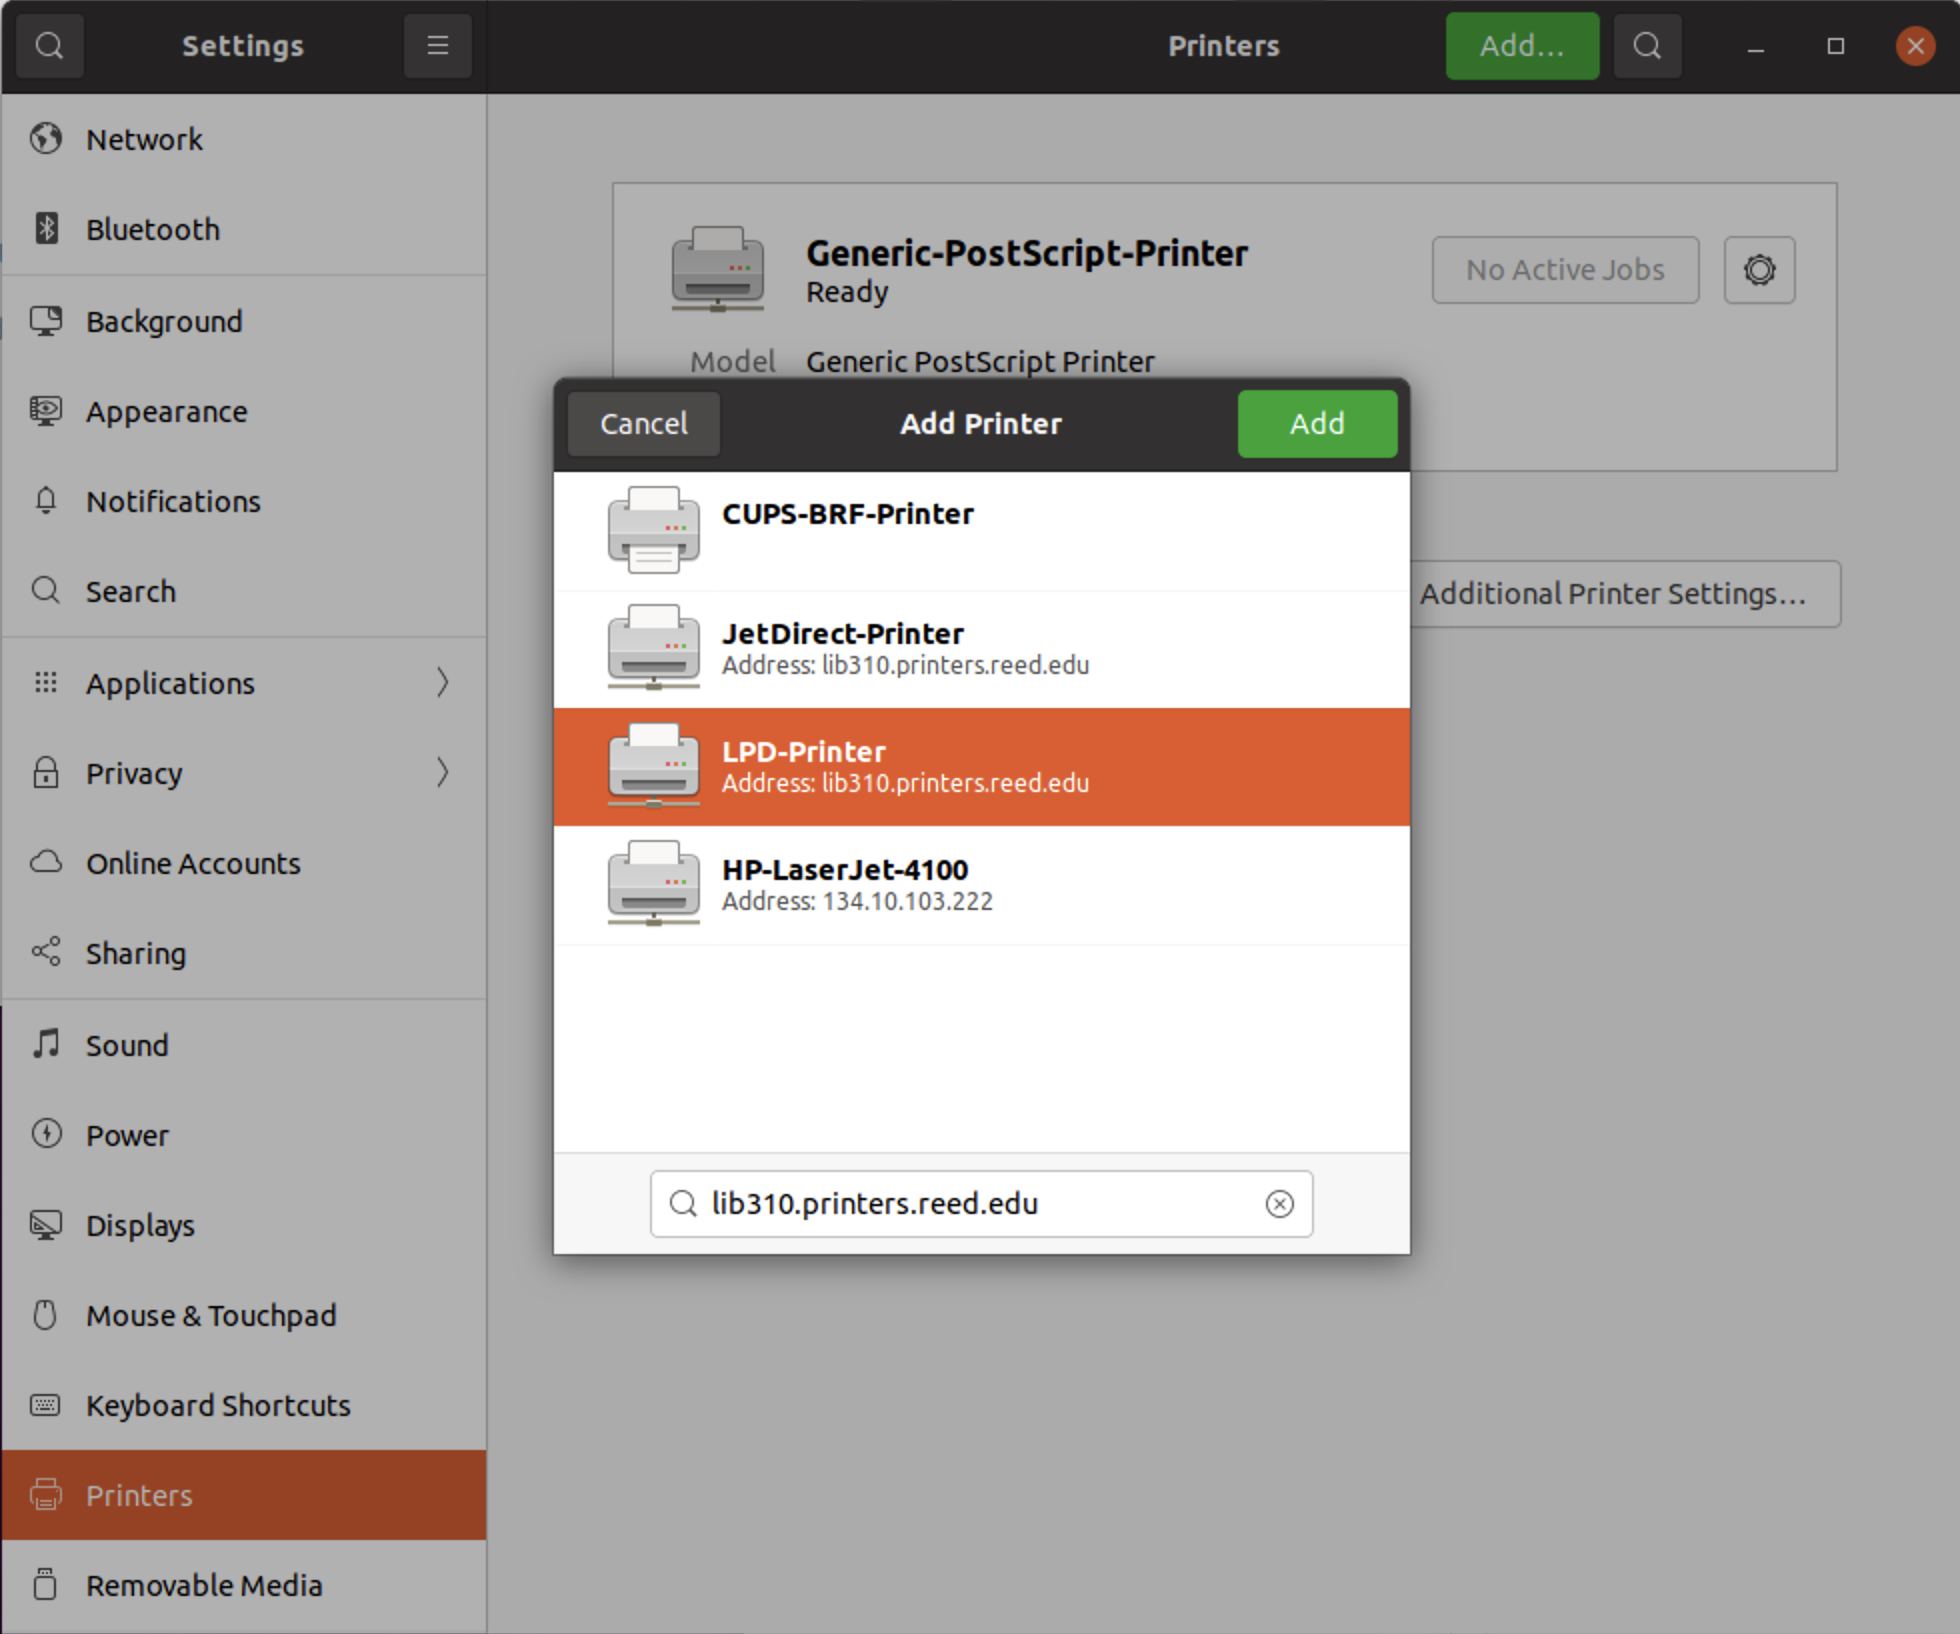
Setting up a printer in Ubuntu
- Settings > Printers
- Click "Add..." button
- Type in the network name of the printer (ie lib310.printers.reed.edu)
- Select "LPD-Printer" and Add.
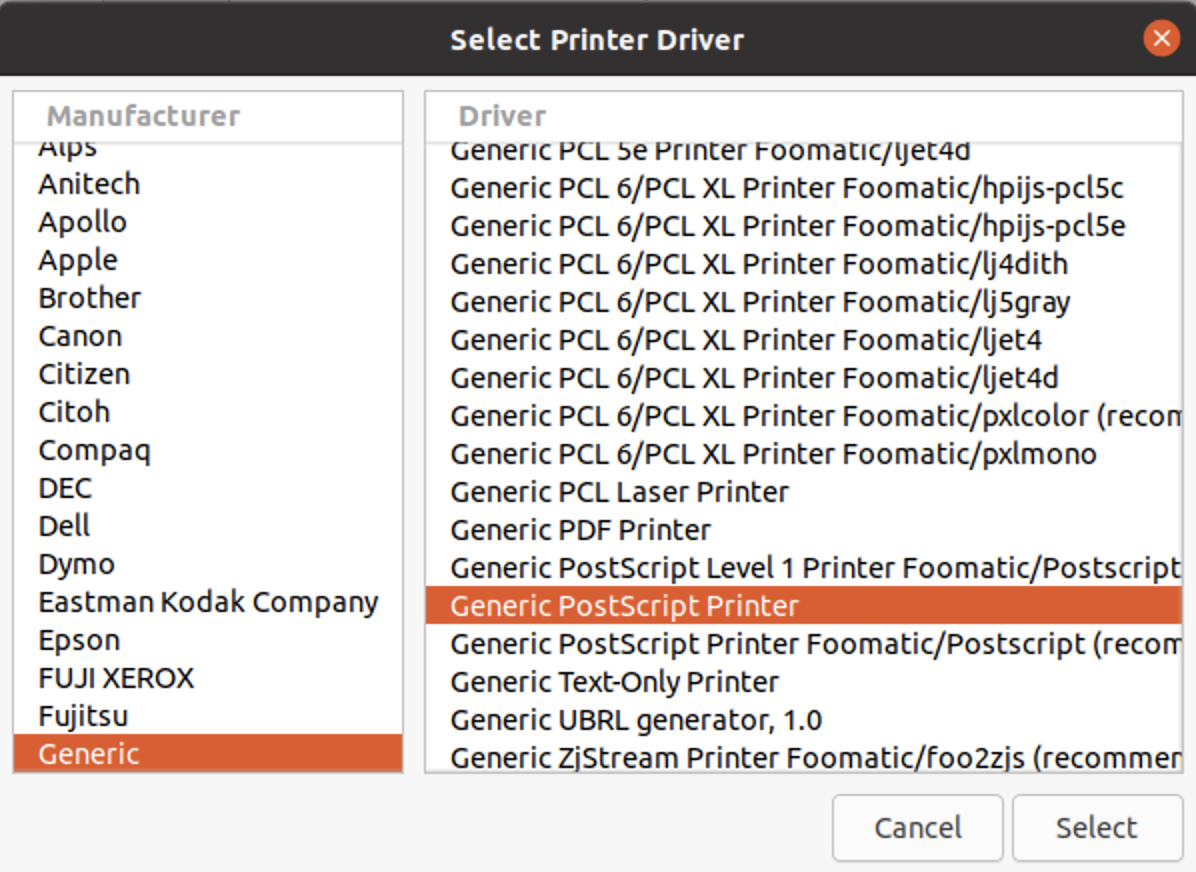
5. For Driver selection, choose "Generic Postscript Printer."
6. It is advisable to rename the printer.