Writing Your Thesis in Word 2016 and newer (Mac)
Below are instructions for performing the most common thesis formatting tasks in Word 2016. Make sure you are using the Word thesis template! Please see our general Word thesis instructions which is helpful no matter what version of Word you're using.
- Styles
- How to view/apply styles (Video Guide)
- How to modify styles
- Inserting section breaks (Video Guide)
- Fixing broken section breaks (Video Guide)
- Pagination
- Inserting images (Video Guide)
- Updating Tables (Video Guide)
Styles
"Styles" are used in Word to easily apply a set of formatting attributes--such as font, font size, indentation, and spacing--consistently throughout a document. Learn more on our Word thesis page.
How to view and apply styles
- Select the Styles Pane in the upper right hand corner of the Home tab.

- You'll see the styles pane open on the right side of the window.
- To see what style is applied to a particular part of text, select it in the document. The applied style will be shown in the Styles Toolbox.
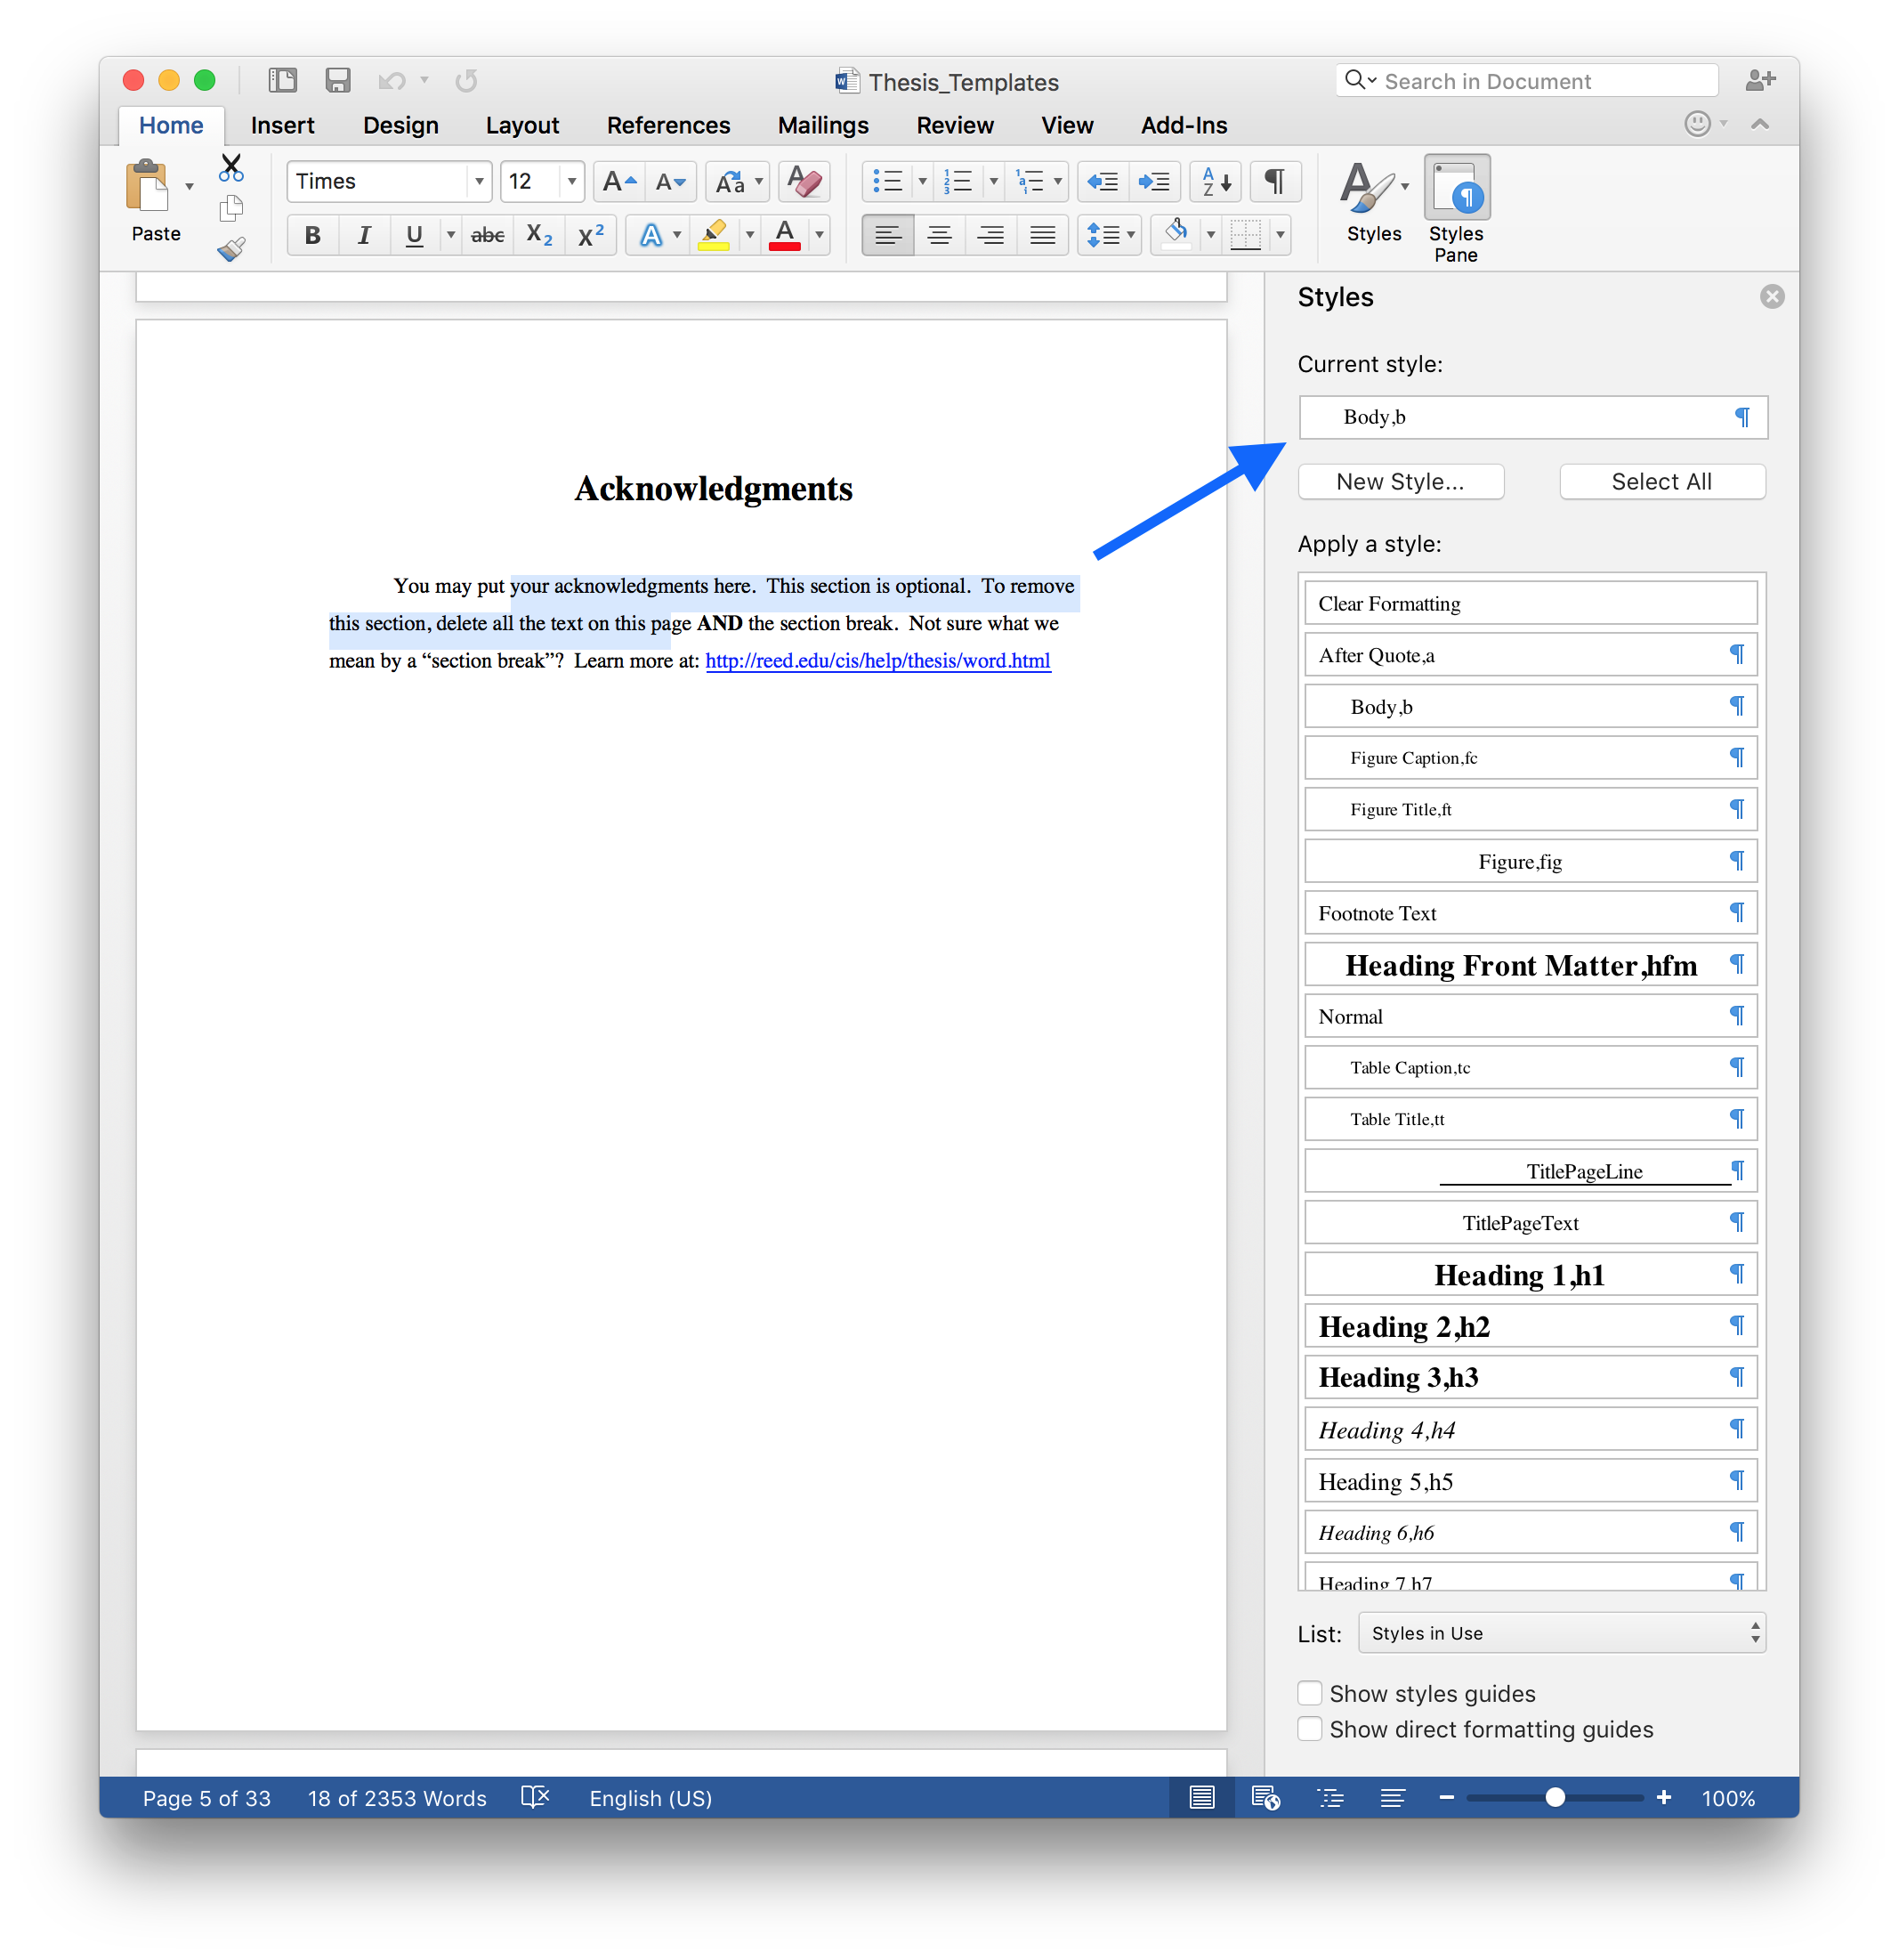
- To apply a particular style, select the text in the document (most styles are applied to an entire paragraph) and click the corresponding style in the Styles Toolbox.
- Occasionally the style won't be applied correctly. When this happens, choose "Clear Formatting", then apply the style again.
Modifying Styles
If you don't like a particular style, modify it to meet your needs!
- Click the drop down arrow next to the style of choice in the toolbox.
- Choose Modify Style...
- Change the parameters you want. More options are available from the Format drop-down box.
- Click OK when you're done and apply your changes.
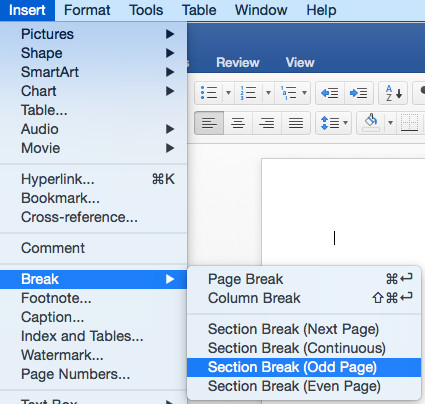
Section Breaks
The Word thesis template is formatted for double-sided printing. As a result, you need to insert an Odd section break at the end of each chapter and each section in the front matter. This ensures the first page of each chapter will start on an odd page (the right-hand side of a book).- Click the Show/Hide ¶ button to see what section breaks you already have.
- Go to the Insert menu > Break.
- Choose Section Break (Odd Page)
If your chapter is not starting where you are expecting, for instance chapter 1 ends on page 9 but chapter 2 starts on page 13, you might have extra section breaks that you cannot see. To delete these, see the video below:
Note: If you've changed your thesis to be single-sided, you need to use "Next Page" breaks instead of Odd.Tips:
- Only use one section break at a time. Multiple consecutive breaks create erroneous blank pages.
- If you need to force something to the following page (like an image), insert a regular page break (Insert menu > Break > Page Break)
Fixing broken section breaks
If you insert a section break and it messes up the previous section break, fix it this way:
- Format menu > Document > Layout tab.
- Select "Section start: Odd page"
- Check "Different odd and even" and "Different first page"
- Apply to: "Whole document"
Pagination
The thesis template is set with correct pagination but it will probably break as you use it. Follow these guidelines for fixing it. Because it can be tricky, stop by the Help Desk if you get stuck.
How to make the first page of your introduction page one
The first page of your introduction should begin on page 1.
- Double-click in the header area at the top of the page.
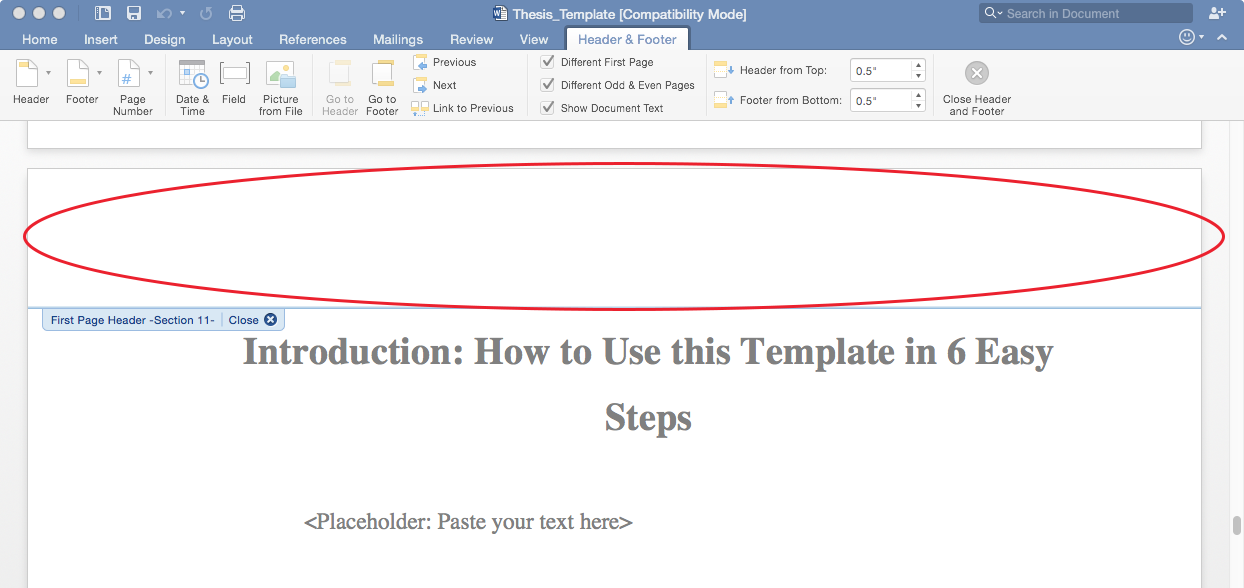
- Click the Header and Footer tab. Make sure these are checked: "Different First Page", "Different Odd & Even Pages".

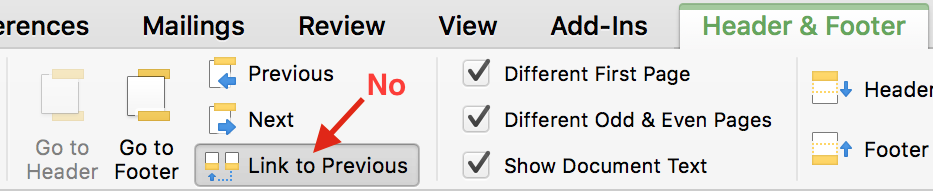
- Make sure "Link to previous section" is UNchecked.
- In the menu above, Go to the Insert menu > Page Numbers.
- Click the Format button on the lower left.
- Make sure "Start at" is selected, and "1" is too.

How to suppress page numbers on the first page of chapters
The first page of each chapter should not have a printed page number (but will count in the pagination).
- Make sure the correct section break is inserted at the end of the previous chapter (e.g., Odd section for double-sided format). See instructions above.
- Double-click in the header area at the top of the page.
- Click the Header and Footer tab. Make sure these are checked: "Different First Page", "Different Odd & Even Pages"
- If the page number still appears, select it and delete it. Then check the rest of the pagination to make sure it didn't break something else.
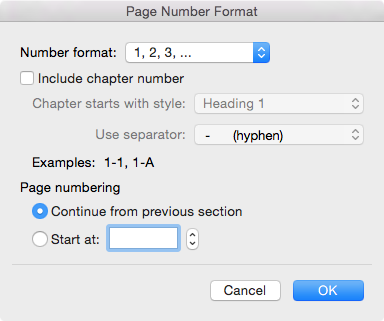
How to set continuous pagination (e.g., fix restarting at "1")
Page 1 starts on the first page of the first chapter (usually Introduction). Sometimes, numbering will restart in later parts in your document.
- Go to the page where numbering is incorrectly restarting at 1.
- Go to the Insert menu > Page Numbers.
- Click the Format button on the lower left.
- Select "Continue from previous section" and click OK.
How to insert page numbers
Occasionally it may be necessary to insert a page number where one has disappeared.
- Go to the page and double-click in the header area at the top of the page.
- Click the Header and Footer tab.
- Click the "Page #" icon.
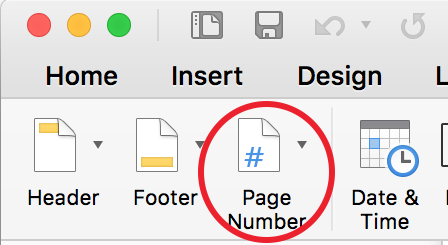
- Align the page number accordingly (right-justified for an odd page; left-justified for an even page)
Inserting Images
Make sure you have the image to be inserted stored on your computer. Do not do a copy and paste from another document or web page!- Place your cursor where the image should be inserted (make sure it's in a new paragraph)
- Put the paragraph in the "Figure,fig" style (see how to apply styles above)
- Go to the Insert menu > Pictures > Picture from File...
- Select the file stored on your computer.
Tables
To change what levels appear in your table of contents, you will first have to delete the old one and then insert a new one. The video below shows you how to do this.
If you need to update any of your tables or list, like the table of contents or list of figures, you need to right click them and click "update field" and choose "update entire field." The video below shows how to this.