Accented Characters in Banner Forms
Banner Forms are capable of accepting a wide range of characters using the UTF8 character set. We'll refer to any character that is not readily available on a typical ASCII (American Standard Code for Information Interchange) keyboard as a "non-ASCII accented character."
You can use your Mac's Character Viewer (also called Emoji & Symbols) to insert non-ASCII accented characters.
Chart of UTF8 characters that can be used in Banner.
These instructions will walk you through using the Mac's Character Viewer to insert non-ASCII accented characters into a typical name field on a Banner form.
- Accessing the Character Viewer
- Inserting the non-ASCII into the Banner Form
- Creating the "ASCII Equivalent" Name Type Record
- Accessing Characters "Saved to Favorites" in the Character Palette
- UTF8 and Excel for the Mac
- Additional Assistance
Note: This is a page for administrative staff with permission to use Banner.
Accessing the Character Viewer
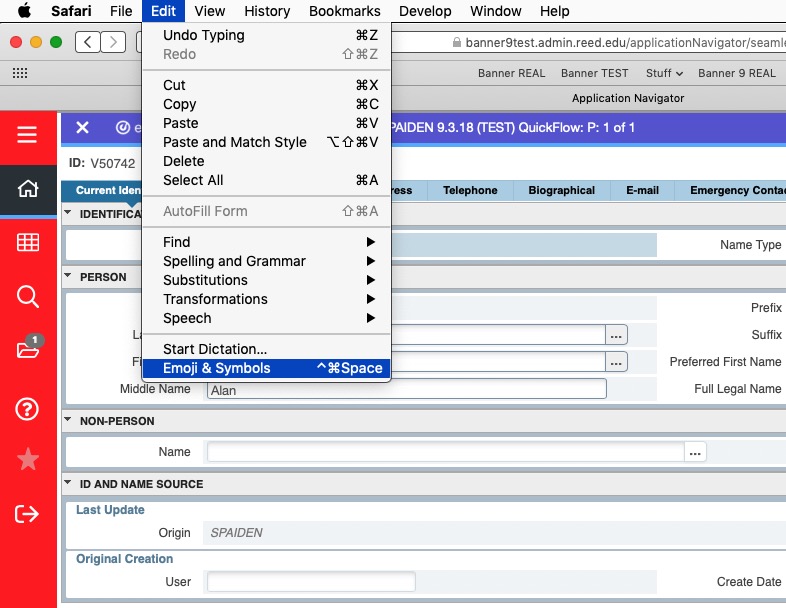
In Banner, click the 'Edit' menu in the top toolbar then choose 'Emoji & Symbols' from the bottom of the dropdown list.
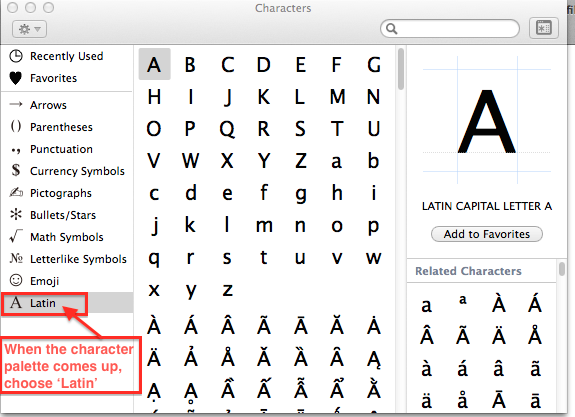
When the Character Viewer comes up, choose 'Latin' from the bottom of the left-hand list:
You will find most of the commonly used non-ASCII accented characters in the Accented Latin Characters section. Scroll until you find the character you need and select it.
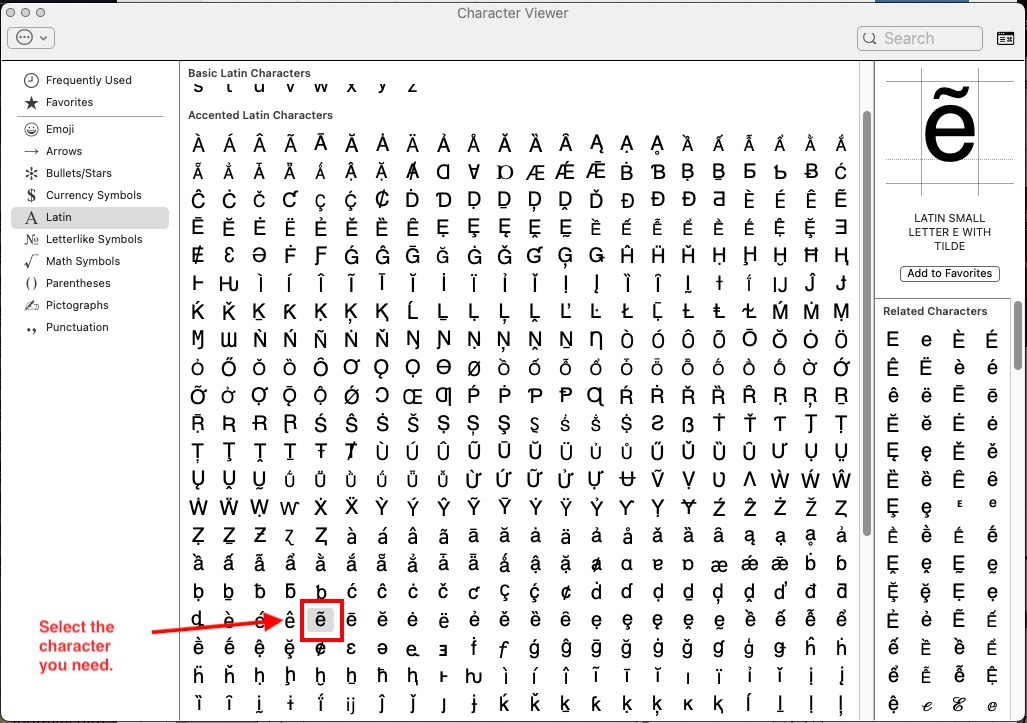
Highlight the non-ASCII accented character you need and return to Banner.
NOTE: If you think you might use this character again in the future, you can click the 'Add to Favorites' button to make it easier to find next time.
Inserting the Special Character into the Banner Form
Once you have found and highlighted the character you want in the Character Viewer, return to the Banner form. Place your mouse cursor where you want to insert the character, or highlight a character you want to replace. Double-click on the character in the Character Viewer. This will insert the character from the Character Viewer into Banner. The Character Viewer works in many other applications too.
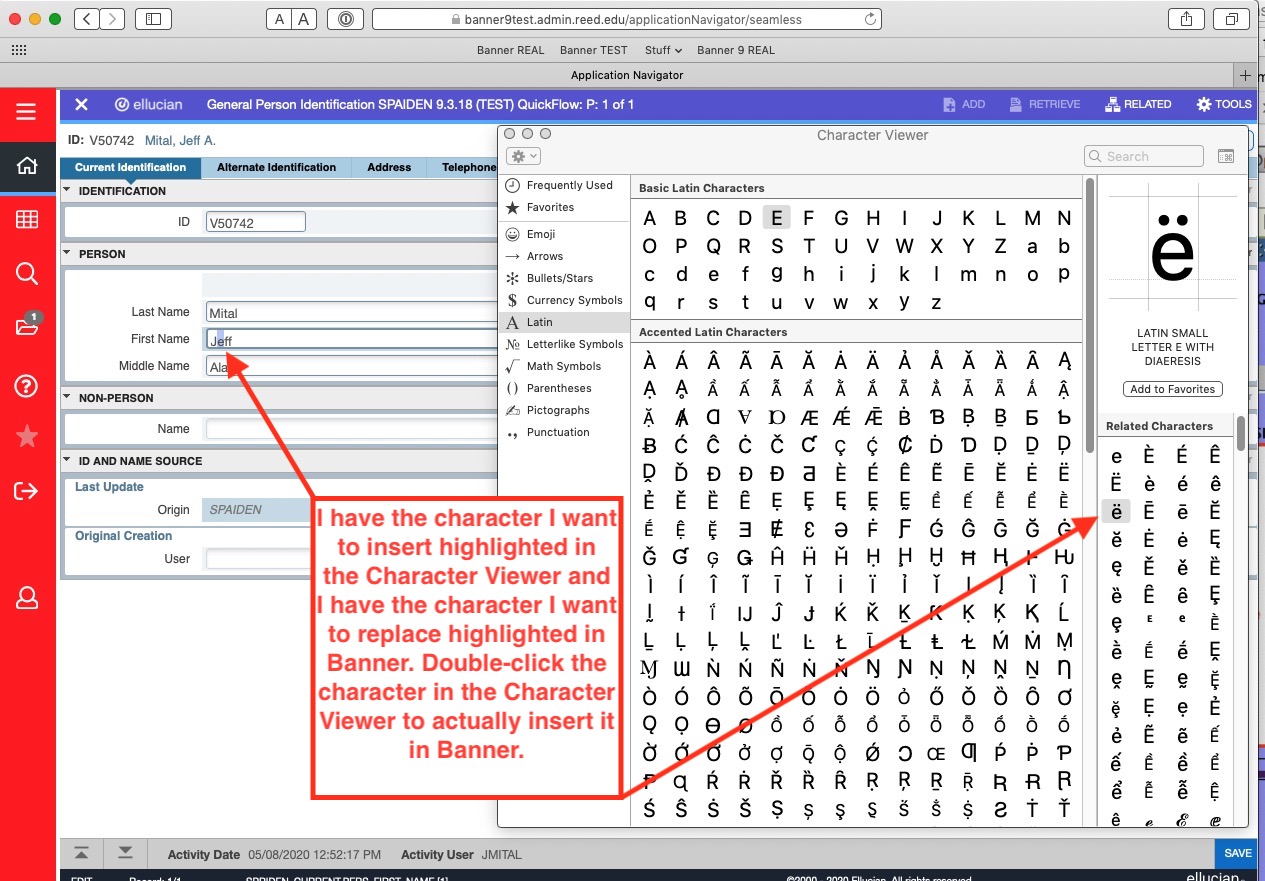
The non-ASCII accented character will appear in the place you have specified. Once you are done entering or changing the data, Save the record:
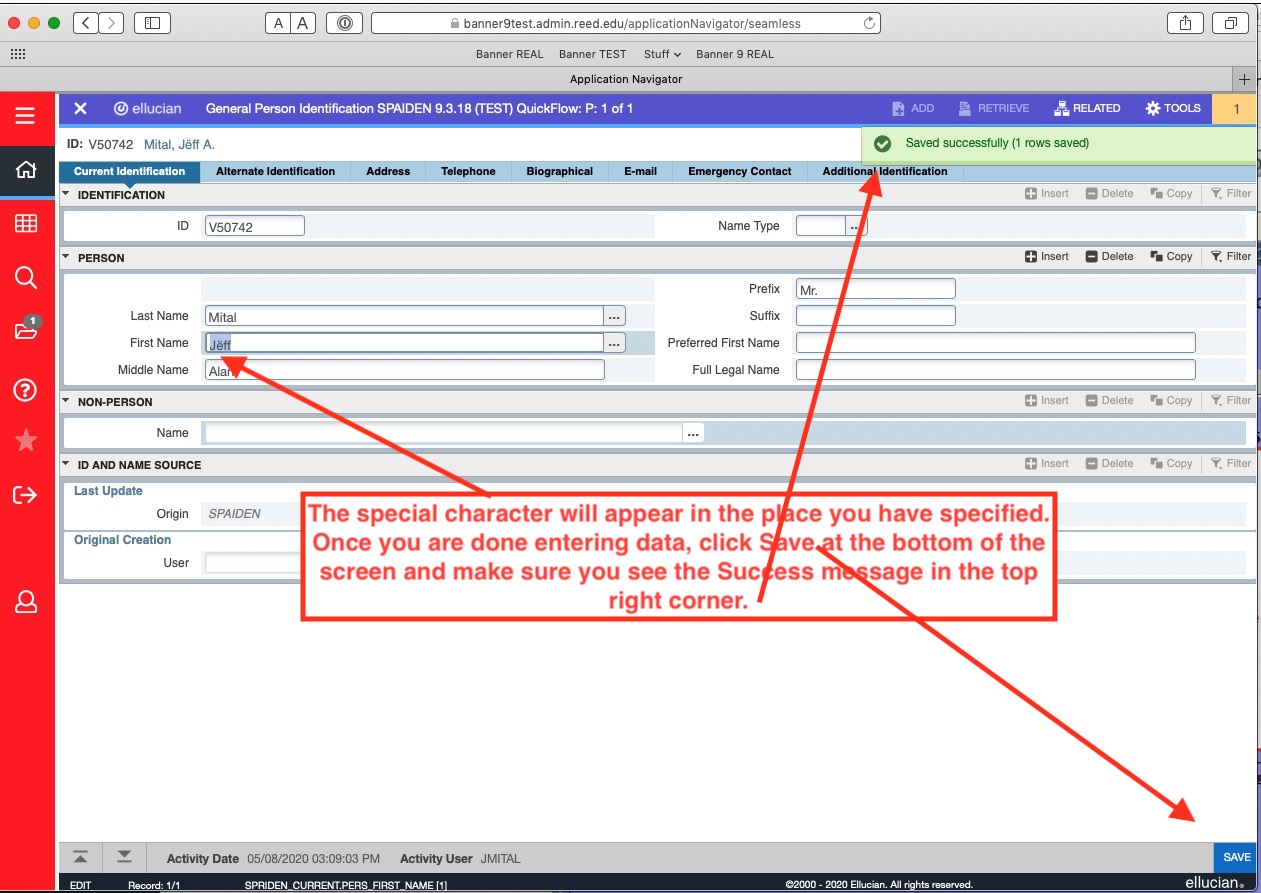
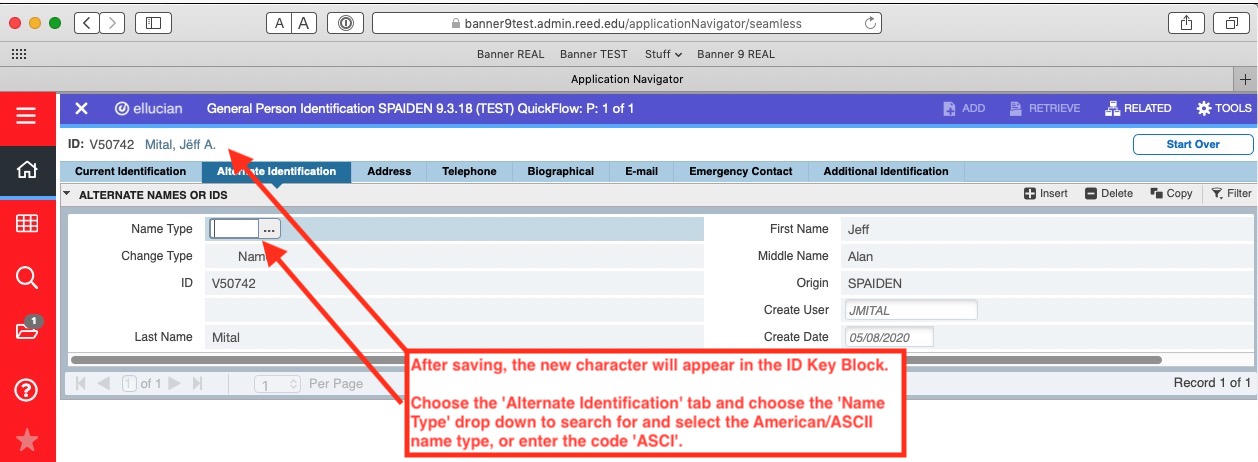
After saving, if the character was inserted into a name field, it will appear in the ID Key Block.
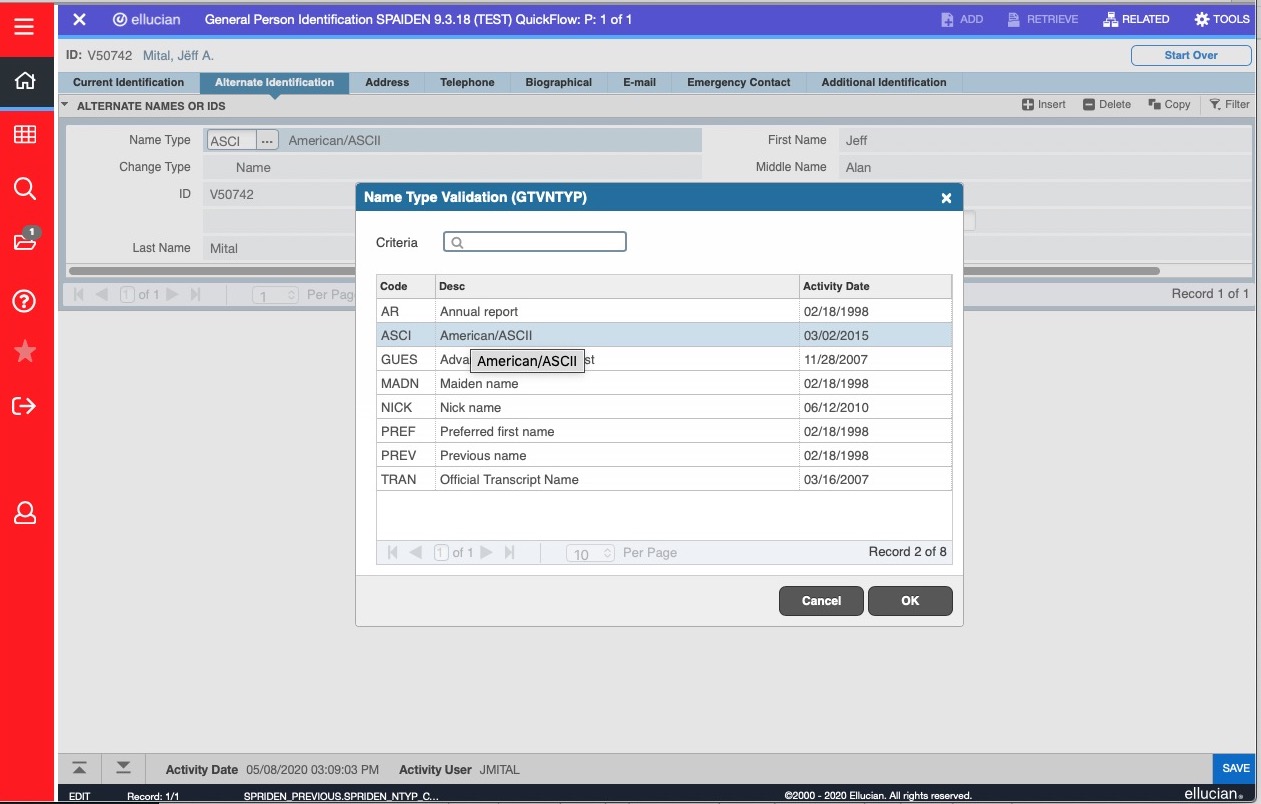
Creating an "ASCII Equivalent" Name Type Record
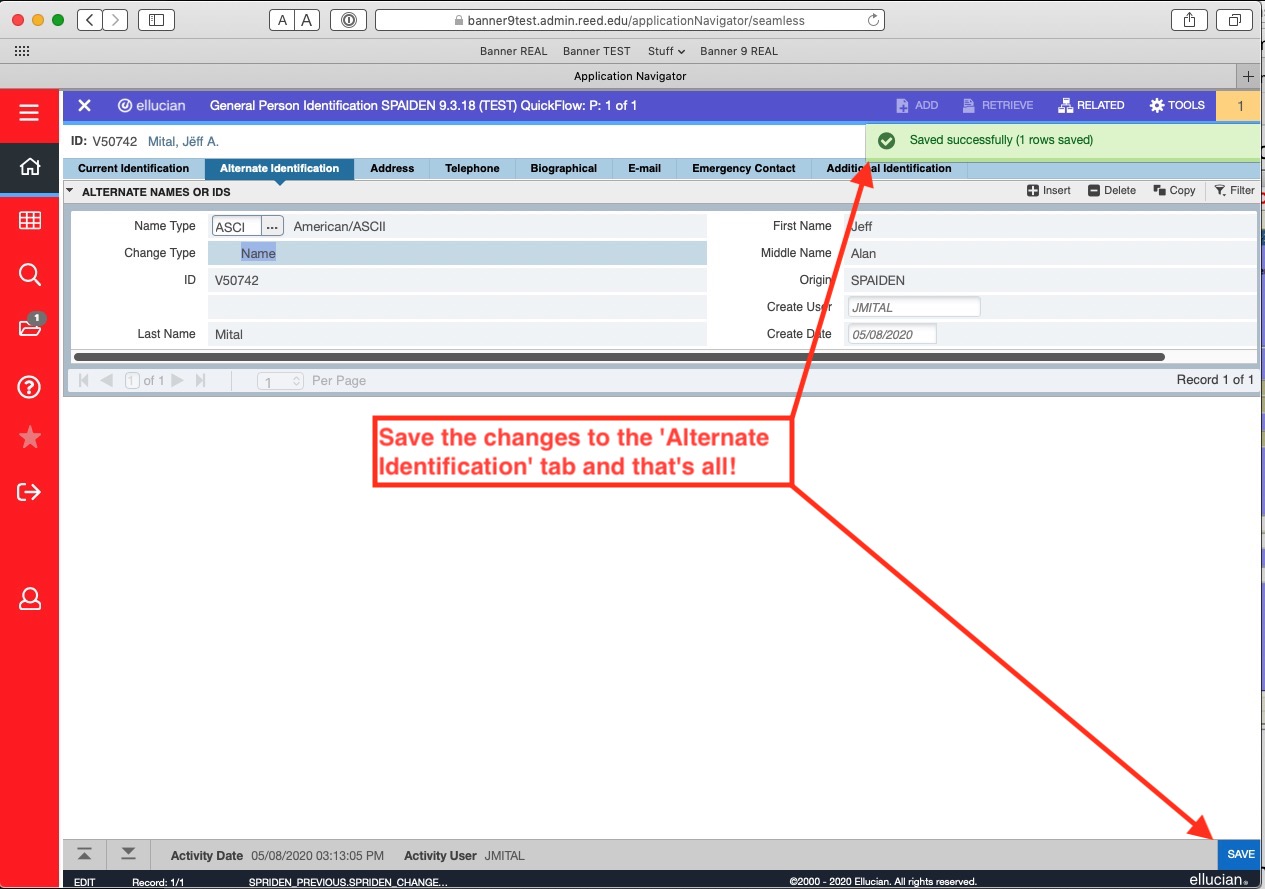
Save the changes made to the 'Alternate Identification' tab and you are done!
For people who already exist in Banner, there are two possible update scenarios:
- A person has a name with non-ASCII accented characters, but no ASCI Name Type record. To fix this, simply create an ASCI Name Type on the Alternative Identification tab as outlined above.
- A person has a name consisting of only ASCII characters, but wants their name updated with non-ASCII accented characters to reflect the actual spelling. For example, we can update "Perez" to "Pérez". First, correct the name on the main SPAIDEN screen and Save the record. Then, add the ASCI Name Type record on the Alternative Identification tab as outlined above.
The key takeaway is that the name with the non-ASCII accented characters should always be the name on the main SPAIDEN screen. For those with behind-the-scenes knowledge of Banner, this will be the name where the spriden_change_ind is null. The version of the name stripped of non-ASCII accented characters should always be the Alternate Name Type of ASCI.
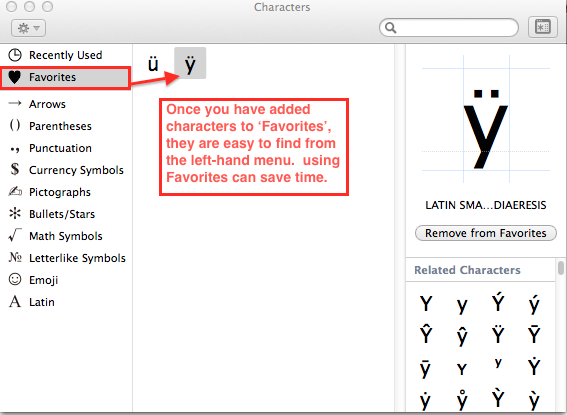
Accessing Characters "Saved to Favorites" in the Character Viewer
Once you have added characters to 'Favorites' in the Character Palette, they are easy to find from the left-hand menu in the Character Viewer. Click on 'Favorites' to see the list of favorited characters appear in the main section.
Additional Assistance
For additional assistance with inserting special characters into Banner forms:
- Email enterprise-apps@reed.edu