 |
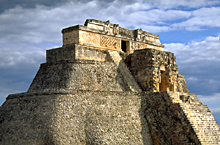
Temple V was added on top
of Temple IV, requiring new staircases on both sides
of Temple IV.
Jan. 2001 |
|
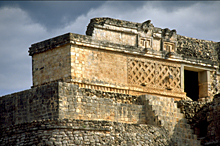 |
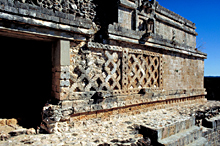
Detail of Temple V as seen in photo at left.
Jan. 2001 (200 mm lens) |
|
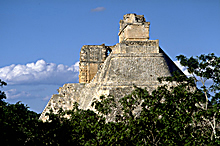 |
South end of Pyramid, showing both
grand staircases, the west staircase steeper, also showing
passage behind Temple IV.
Jan. 2003 |
|
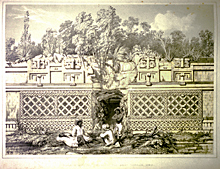 |
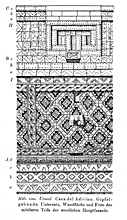
1844. Print, showing the west facade unusually
well preserved, except for partly collapsed wooden lintels
and frieze above doorway (cf. 2003 photos below).
Chromolithograph in Frederick Catherwood, Views of Ancient Monuments in Central America, Chiapas, and Yucatan, 1844. Based on Catherwood’s 1839-42 on-site drawing, but for this lavish folio slightly reconstructed and glamourized. This image scanned from a 35mm slide taken from a copy in the AMNH (RF-13-K). Reproduced Courtesy of The Library Special Collections, American Museum of Natural History. |
|
 |
1917. Print, showing elaborate detail and remains of standing
male figure originally standing on a projecting base.
Closely based on Seler’s on-site drawing,
published in Seler, “Die Ruinen von Uxmal,” 1917
|
|
 |
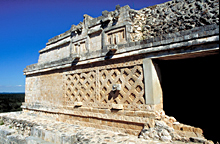
Temple V; looking south across front facade, the doorway reconstructed with reinforced concrete doorjambs and lintel; surviving pelvis of sculpted figure tenoned into wall (cf. 1917 print at left).
Jan. 2003 (24mm lens) |
|
 |
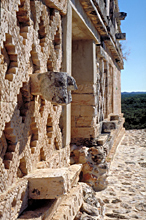
Temple V, front facade, left side; including surviving pelvis of sculpted figure tenoned into wall.
Jan. 2003 (24mm lens) |
|
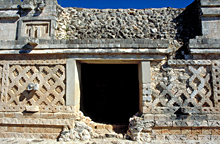 |
Temple V, front facade, center; doorway restored (cf. 1844 print above left).
Jan. 2003 (24mm lens) |
|
 |
Temple V, front facade, right side; important survival.
Jan. 2003 (24mm lens) |
|